Do you have a pile of mails waiting for reply every day? If you know how to utilize the Gmail canned responses function, you can set the routine reply content to reply quickly in the future, in return save more time for yourself!
What is Gmail canned responses?
I believe that if you have a web page that you often visit, and you will add it to”My Favorites”so that you can quickly browse on it in the future. The so-called”canned responses”is the same. By setting the standard or commonly reply content as one of the insertion options, it can be used routinely in the future.
How to set Gmail canned responses? (2018 new Gmail interface)
This feature is not difficult to set at all! As long as you follow the steps to set up, you can create a variety of gmail canned responses, then modify and delete them at any time. There are 4 steps to set them and I will walk you through all steps.
Step 1. Enable the Canned Responses (Templates)
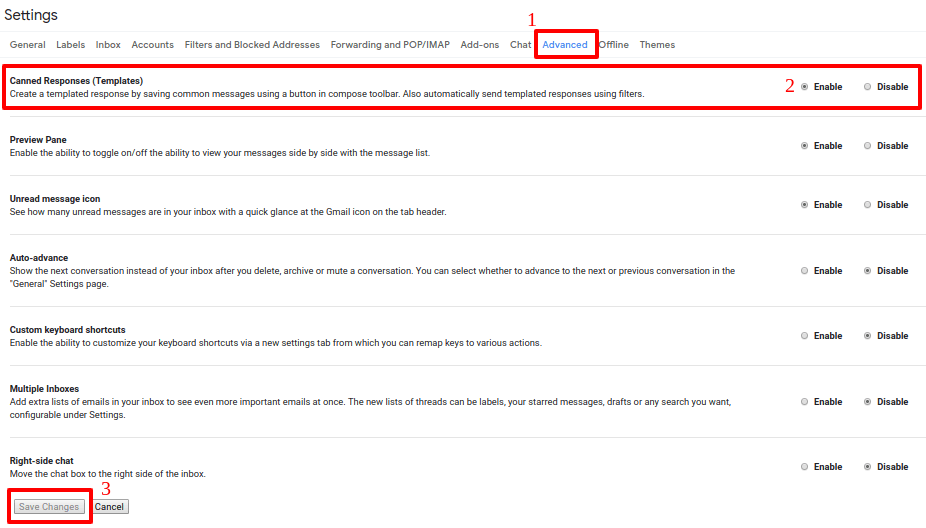
First, go to”Settings”at the upper right gear icon in Gmail to enter the setting page like the picture shown above. Click”Advanced”(No 1 in the above figure) to enter the advanced setting page, click”Enable”in the Gmail canned responses block (located at No. 2 above) and remember to save changes (No. 3 in the above figure). Alright, we have turned on the Gmail canned response!
※ In addition to the Gmail canned responsse,”Advanced”has also other convenient functions, and those who are interested in it, is recommended to explore it.
Step 2. Create a new canned responses
Once the Gmail canned responses is enabled, you can create a canned response template based on your needs. The detailed steps are as follows:
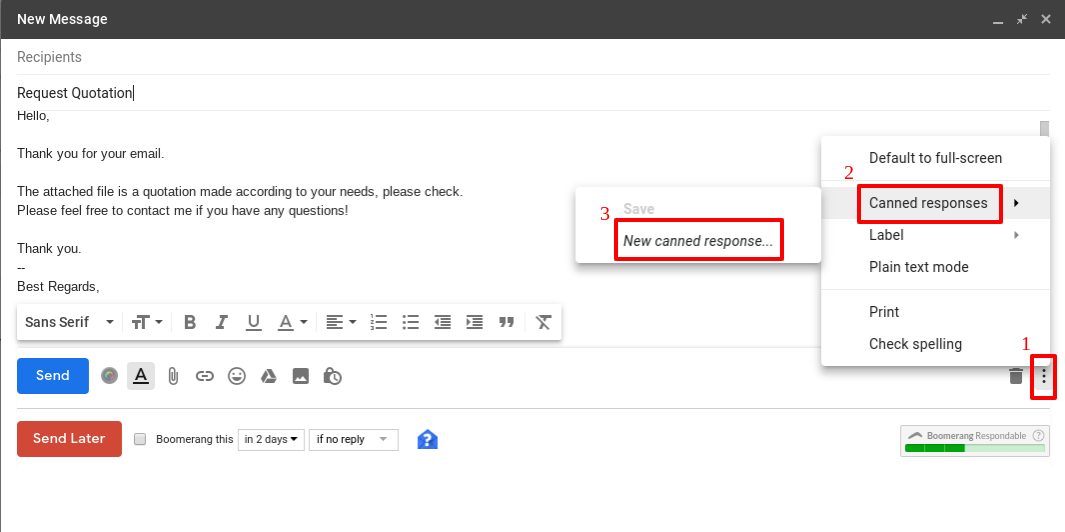
- Please enter the responses into the content area.
- Click on”More option”at the bottom right (above Figure No. 1) after you have finished your responses content.
- Click”Canned Responses”(at the top of Figure No. 2)
- Finally, click”New Canned Responses…”below the”Save”to complete, and you can name it after you completed the response template.
Step 3. Use the Canned Responses template to reply mails
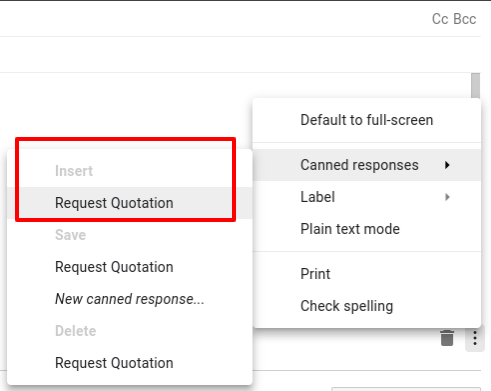
In future, when you are going to reply recipient with this type of responses, you can click”More option”at the bottom right of the blank page and select”Canned Responses”to check the response that has been created before. Click on the selected canned responses template under”Insert”, then it will be inserted into the mail content.
Step 4. Delete the Canned Responses
After the project or specific work is handed over, there will be a response template that you no longer need to use. Hence, you can delete it!
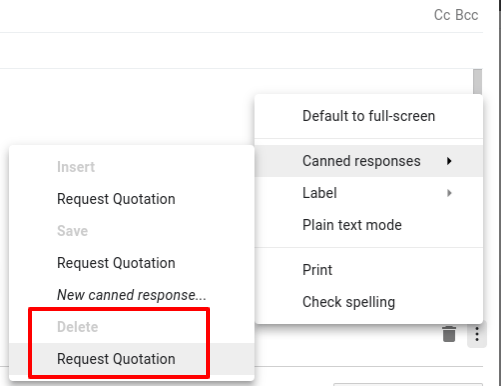
Click”More Option”at the bottom right of the mail and select”Canned Responses…”. Then, under the”Delete”, you can delete the canned responses that you do not want to use again.
Modify the Gmail Canned Responses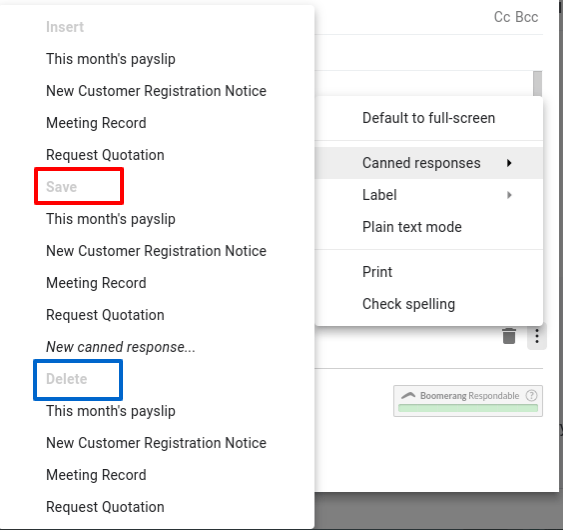
When you start using this feature, you may generate many templates for different projects, different customers and etc. It should be noted that if you want to modify template A, you can open and modify the content, then save the template A by clicking back the template A to overwrite the template.
In the matter of there is no obvious boundaries between the”Insert”,”Save”and”Delete”, so please be careful not to make mistakes in order to avoid accidentally deleting template or overwriting the wrong template!
So, for office workers who are working hard every day, time is the money! In order to have the best productivity in work, to deal with business quickly and finish tasks on time. The canned responses template is highly recommended.