I believe that those who are familiar with cloud tools, when they encounter documents that need to be signed, they have to download and print, which is quite troublesome. Therefore, I am going to share with you how to use digital signatures in Google files and online PDF with simple 8-step process to create a totally paperless cloud office!
Paperless office, create a more environmentally friendly with digital signature!
With the rapid development of the Internet and Information Technology (IT), government agencies and private enterprises are promoting the era of paperless offices. This is because paper making and printing will cause pollution to our environment. In fact, paperless offices can reduce logging, maintain forests, reduce the transportation for books and newspapers, in return improve the environment. However, we will encounter inevitable exceptions, which is signature while reducing photocopying and printing of documents. Therefore, I would like to share with you a useful tool”HelloSign”application to sign online documents to avoid downloading and printing files, and to be environmentally friendly to protect our Earth.
How to install and set up the digital signature tool “HelloSign”?
Before I was familiar with“HelloSign“, I need to print the file and scan it back to become an electronic file. However, this method is waste of papers and time. After knowing the benefits of using“HelloSign“, I am able to create signature on my laptop easily. So in future, I can upload the file and signing it from my laptop.
HelloSign allows you to generate your digital signature through the browser. You can install“HelloSign“extension and use it with Google Drive. In the future, you are able to sign the file directly in the cloud, which is more faster and efficient.
Step 1. Find the“HelloSign“extension or you can click from here.

Step 2. Link”HelloSign“to your Google account

Step 3. Open the online file you need to sign, and click “Add-ons“→“HelloSign“→“Sign Document“.
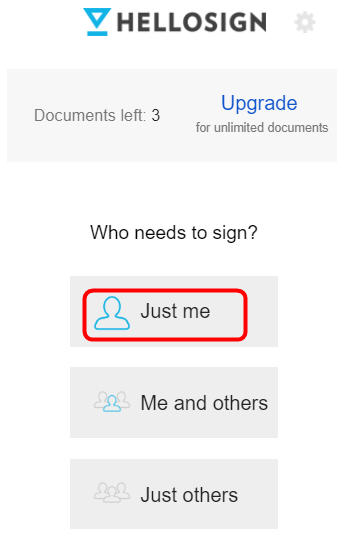
Step 4: Click the menu on the right to select the signature type. Select“Just me“here.

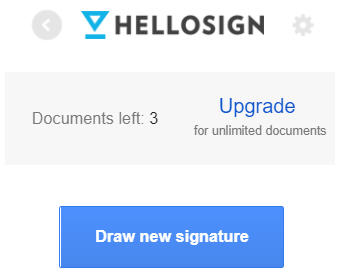
Step 5. Choose“Draw new signature“to create a new signature file.

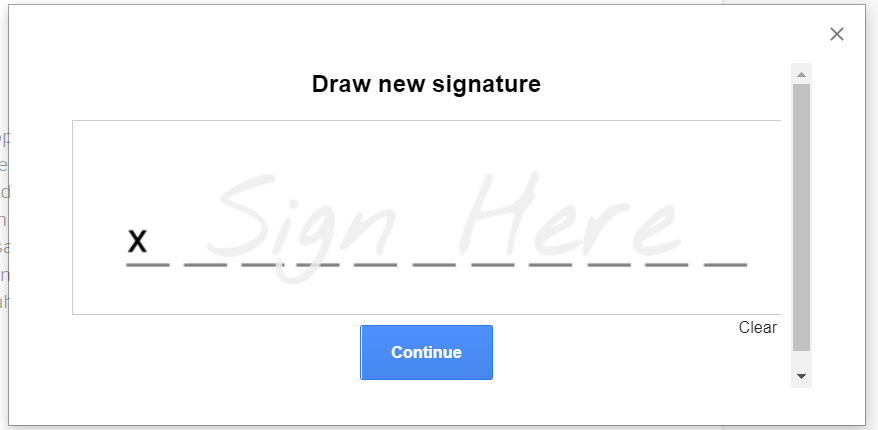
Step 6. You can use your tablet to write your signature in the blank space. If the sign is error, you can click“Clear“in the lower right corner to erase and then rewrite. After confirming that there is no mistake, click“Continue“.
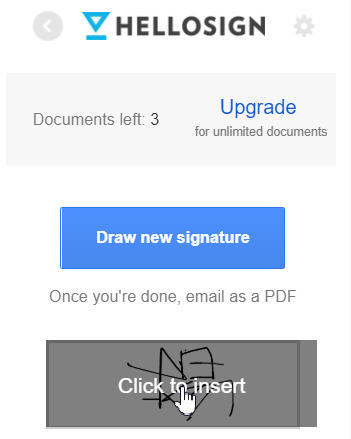
Step 7. Move the cursor to the place to be signed. Click“Click to insert“in the expected digital signature to insert the signature into the file.

Step 8. Finally, make sure to check the location of the signature and complete the digital signature.

The above is the 8 steps to use the digital signature for online documents and PDF file. Isn’t it very simple? Just follow the above steps to set up your digital signature. In this way, you don’t have the need to print the document for signature anymore. In the future, all office work can be completed on the cloud!

